Welcome participants to your program by guiding them through a program onboarding.
Why?
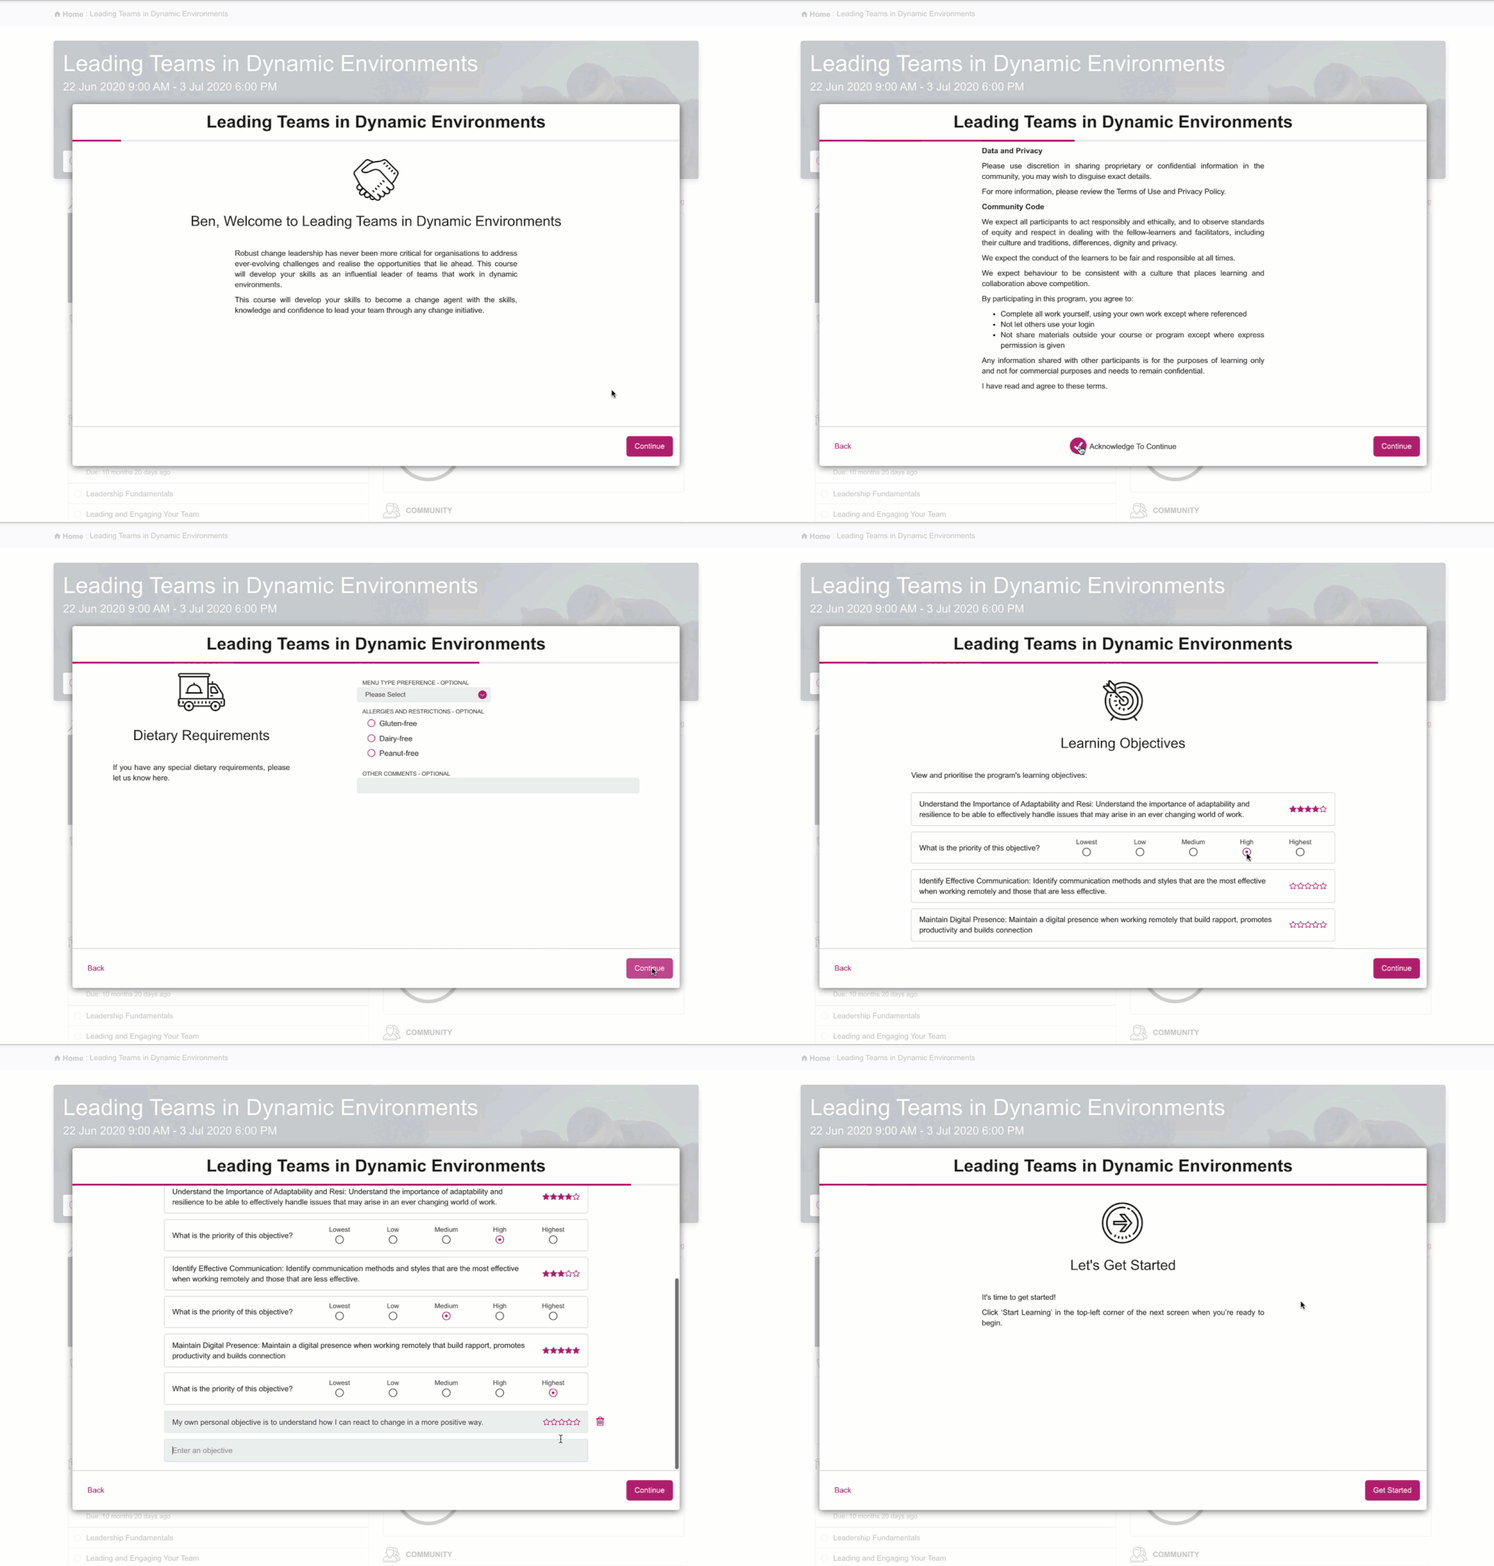
Onboarding is a feature of Academy that allows you to welcome participants to their program. Onboarding introduces the program; allows participants to add sessions to their calendar; asks participants to specify any dietary requirements (eg. for programs that include a face to face component with catering); asks participants to view and prioritise the program learning objectives; and several other functions (listed below).
Participants can complete the onboarding ahead of time, before getting access to the rest of the program materials.
For a participant, your program onboarding might look something like this:

How?
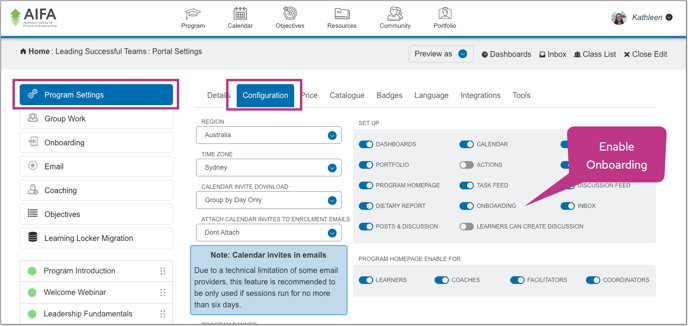
Enable the Program Onboarding in the Program Settings:

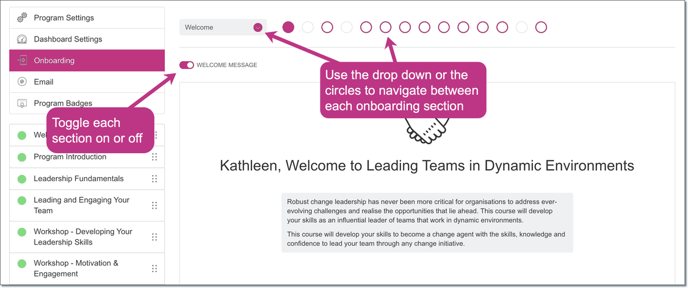
Then, customise the Program Onboarding by choosing Onboarding from the left menu.
Navigate through each onboarding section using the drop-down or the circles. All sections can be enabled or disabled using the toggles.

Onboarding Sections:
Each section of the Onboarding is explained below.
|
Section |
Description |
|
Welcome |
Introduce your program and welcome participants. |
|
Profile |
Prompt participants to update their profile details. They can also upload a photo if they wish. |
|
Welcome Video |
You can also introduce your program via a video. You may also use this video to introduce the program facilitators and experts. Videos can be uploaded as an mp4, or streamed from Vimeo or Youtube. |
|
Coaching guide |
Share a guide for coaches to follow when assisting their learners with the program, this setting must first be enabled via the coaching tab to become visible within the onboarding. |
|
Your coaches |
If you have enabled coaching for your program, this section can be used to display and introduce the learners coach. |
|
Facilitators |
Participants with the Facilitator role (in the Class List) will appear here. They must have their Directory Settings enabled in their profile, otherwise they will not display. |
|
Coordinators |
Participants with the Coordinator role (in the Class List) will appear here. They must have their Directory Settings enabled in their profile, otherwise they will not display. |
|
Badges |
If you have enabled badges in your Academy platform and in the program, the badge image will display here. Use the text box to introduce your badge. You can read more about badges and micro-credentials here. |
|
Learning Journey |
Use this section to explain the learning journey to participants. If you have a visual representation of the learning journey, you can upload an image. |
|
Learning Objectives |
The conscious effort of setting program objectives is proven to increase learner buy-in and motivation to complete the program and reach their goals. Include your Learning Objectives in the program onboarding in this section. You can read more about setting up program learning objectives here. |
|
Learning Contract |
Use this section to give the participant some guidance on what is expected of them when learning online and participating in the program. For example, you might consider including guidance on appropriate discussion and sharing, respectful behaviour, data and privacy, and a community code. The participant will need to acknowledge the contract to continue with onboarding. |
|
Calendar |
Any scheduled session (that is, a session with a start and finish time, either virtual or face to face) will appear on this screen. An Add to Calendar button enables participants to add scheduled session to their calendar in advance of the program beginning. |
|
Dietary Requirements |
If your program includes face to face sessions that are catered, you can use this section to ask for any dietary preferences or restrictions. Dietary fields are managed via the User Profile in Portal Settings. |
|
|
If you’re using WhatsApp to support social networking throughout your program, you can include the WhatsApp link and QR code in this section. |
|
Support |
Let participants know who they can contact for help and support through the program using this section. |
|
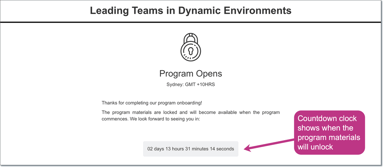
Get Started / Program Lock |
The final section of the onboarding is a ”ready to get started” message. However, if you have locked access to the program materials via the Lock Classroom setting in the Program Settings, participants will see this lock screen:  |
